





Common Laminating Problems and How to Fix Them

Lamination adds protection and improves the appearance of many printed materials. It can protect surfaces from moisture, handling, scratches, and general wear. However, lamination does not always produce a smooth and clean finish.
Problems can occur during preparation, machine setup, material selection, or production. Bubbles, wrinkles, silvering, poor adhesion, and curling are common examples.
Many of these problems have simple causes. Incorrect temperature, pressure, speed, or material settings can affect the final result. Poorly prepared prints can also create problems during lamination.
Understanding these issues helps operators prevent waste and improve production quality. It also makes troubleshooting easier when something goes wrong.
This guide covers common laminating problems and explains how to avoid and fix them. It also provides basic information about print finishing and lamination.
What Is Print Finishing?
Print finishing includes the processes used after printing to improve the appearance, function, or durability of printed materials.
Printing creates the main image and text, while finishing turns the printed sheet into a completed product. Different finishing methods suit different applications and materials.
Common print finishing processes include:
- Lamination
- Folding
- Cutting
- Creasing
- Binding
- Coating
- Foil stamping
- Embossing
- Die cutting
- Saddle stitching
Each process serves a different purpose. Some improve protection, while others improve appearance or make documents easier to use.
Lamination remains one of the most common finishing methods. It provides both practical and visual benefits when operators use the correct materials and settings.
What Is Lamination?
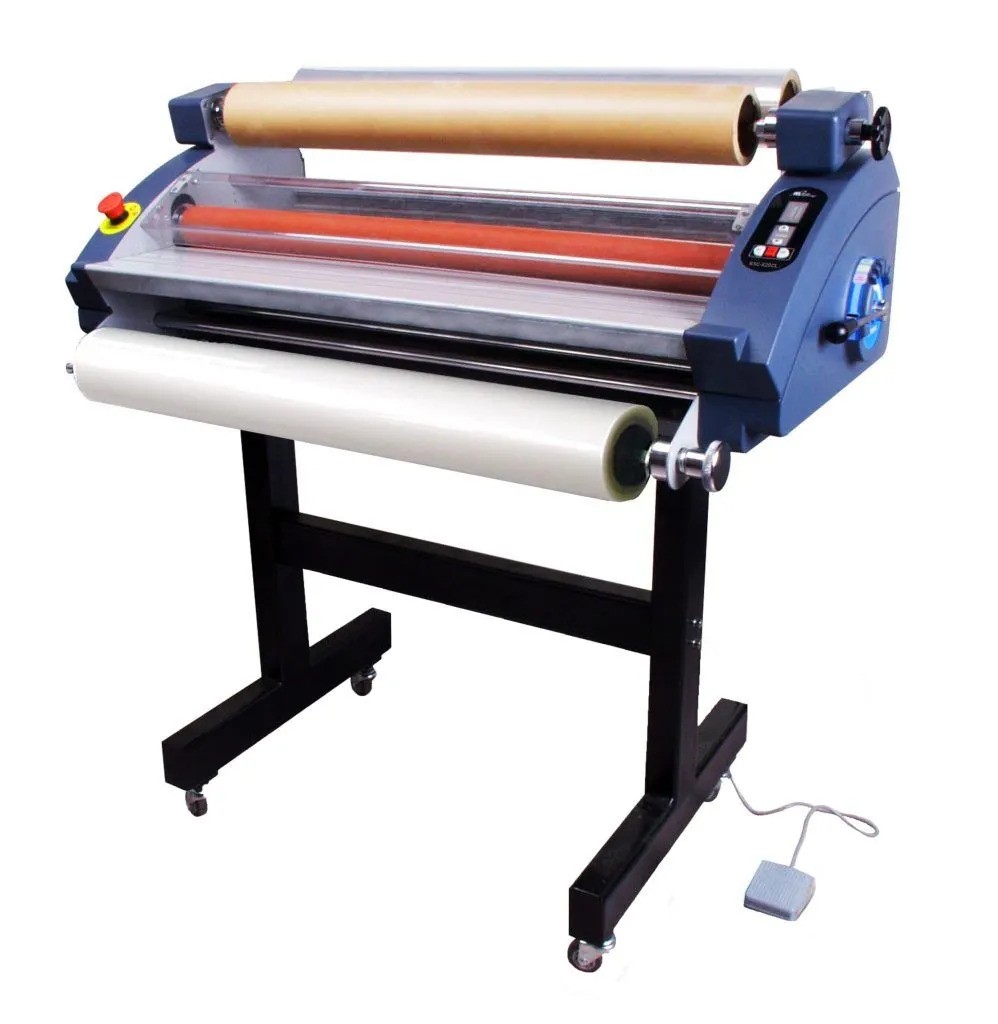
Lamination applies a thin protective film over a printed surface. The film bonds to the material through heat, pressure, adhesive, or a combination of these methods.
Thermal lamination uses heat to activate adhesive on the film. The laminator then applies pressure as the material passes through heated rollers.
Cold lamination uses pressure-sensitive adhesive instead of heat. This method can work well with heat-sensitive materials and certain specialty applications.
Lamination can use different film finishes. Gloss film creates a bright and smooth surface, while matte film creates a softer appearance with less glare.
Laminating films also come in different thicknesses. Thicker films can provide more protection, while thinner films can offer greater flexibility.
The correct film depends on the printed material, intended use, and desired appearance.
Understanding Common Laminating Problems
Laminating problems usually result from incorrect settings, poor preparation, or unsuitable materials. Identifying the cause helps operators choose the right solution.
Some problems appear immediately during production. Others may become visible after the laminated material cools.
Operators should avoid making several changes at once during troubleshooting. Changing one setting at a time makes the cause easier to identify.
A test sheet can also help confirm the correct settings before a larger production run. This simple step can reduce wasted materials and production time.
The following problems occur frequently during lamination.
Bubbles Under the Film
Bubbles can appear when air becomes trapped between the film and printed surface. They can create an uneven appearance and affect the finished product.
Several factors can cause bubble:
- Insufficient pressure may prevent the film from making proper contact with the printed sheet.
- Incorrect temperature can also affect the adhesive. If the adhesive does not activate properly, the film may fail to bond evenly.
- Dust and debris can create small raised areas under the film. Poorly stored materials may also contain particles that affect the bonding surface.
To prevent bubbles, keep the work area clean and check the printed sheets before lamination. Use the recommended pressure and temperature settings for the film. If bubbles appear, operators should first check the machine settings. A small adjustment to pressure, temperature, or speed may solve the issue.
Do not increase temperature without checking the film specifications. Excessive heat can create other problems.
Wrinkles and Creases
Wrinkles can make laminated materials look uneven and poorly finished. They can also affect how the material feels and handles.
- Film tension often plays an important role. Incorrect tension can cause the film to feed unevenly through the machine.
- Misaligned film can also create wrinkles. The film should enter the rollers evenly without pulling toward one side.
- Excessive speed can create problems when the machine cannot maintain proper film contact. Operators should follow the recommended speed for the chosen film.
To avoid wrinkles, check film alignment before production. Make sure the roll feeds evenly and remains properly positioned. If wrinkles appear, stop the machine and inspect the film path. Check the roll position, tension, roller condition, and machine settings.
Operators should avoid forcing wrinkled film through the machine. Continuing production can create more waste and may affect the equipment.
Poor Adhesion
Poor adhesion occurs when the film does not bond properly with the printed surface. The edges may lift, or the film may separate from the sheet.
- Incorrect temperature is one possible cause during thermal lamination. The adhesive needs enough heat to bond with the printed surface.
- Machine speed can also affect adhesion. Moving the material too quickly may reduce the time available for proper bonding.
- The printed surface itself can create another problem. Heavy ink coverage or certain coatings may affect how the adhesive bonds.
- Paper moisture can also influence the result. Store paper and printed materials under suitable conditions before lamination.
To improve adhesion, confirm the recommended temperature and speed for the film. Clean rollers can also help maintain consistent pressure.
If the film continues to lift, test another film that matches the printed material. Different films may perform better with specific inks and paper stocks.
Silvering or Cloudy Areas
Silvering appears as small cloudy or silver-looking areas beneath the film. It can make a finished document look uneven.
This problem often occurs when small air pockets remain between the film and print. Pressure, temperature, or speed may not suit the material. Surface texture can also affect the result. Rough or heavily textured paper may require different settings than smooth stock.
To prevent silvering, use suitable film and follow the manufacturer’s recommended settings. A slower speed may help improve contact in some cases. Allowing laminated materials to cool properly can also improve the final appearance. Do not stack hot sheets immediately after production.
Film Peeling or Lifting
Film peeling occurs when the laminate separates from the printed surface. The problem often appears around edges or corners.
- Poor adhesion usually causes this issue. Incorrect settings, unsuitable film, or surface contamination can all contribute.
- Dust, oil, and other contaminants can reduce contact between the film and material. Keep hands, work areas, and machine surfaces clean.
- Trimmed edges can also expose areas where the film has weak adhesion. Proper lamination and suitable film selection can reduce this risk.
If peeling occurs, check the film compatibility first. Then review temperature, speed, pressure, and the condition of the printed material.
Curling After Lamination
Curling can make laminated sheets difficult to stack, trim, or use. The material may curve toward the laminated side or the printed side.
- Different layers can respond differently to heat and moisture. Film thickness and paper weight can also affect the final shape.
- Excessive heat can increase curling in some applications. Incorrect tension can create additional stress within the laminated sheet.
To reduce curling, use suitable film thickness and machine settings. Allow the material to cool on a flat surface after lamination. Operators should also consider the paper stock before production. Very light paper may behave differently from heavier stock.
If curling continues, test different film settings or materials. A suitable combination can improve the final shape without reducing protection.
Film Sticking to Rollers
Film can sometimes stick to rollers during production. This problem can cause uneven feeding, marks, or machine stoppages.
- Excessive heat may soften the adhesive too much. Adhesive can then transfer onto rollers or other machine components.
- Dirty rollers can also contribute to sticking. Adhesive residue may build up over time and affect material movement.
Operators should clean rollers according to the machine manufacturer’s instructions. They should also use the recommended temperature range for the film. If sticking occurs, stop production and inspect the rollers. Do not continue running material through heavily contaminated components.
Uneven Lamination
Uneven lamination can produce differences in adhesion, appearance, or film coverage. The problem may appear across the sheet or along one edge.
- Uneven pressure can cause inconsistent results. Worn rollers may also fail to apply equal pressure across the material.
- Incorrect film alignment can create uneven coverage. The film should remain centred and feed smoothly through the machine.
Operators should check roller condition and film position before making other adjustments. Regular maintenance can also reduce uneven pressure problems.
How to Prevent Lamination Problems
Prevention remains easier than correcting a large batch of defective material. A consistent preparation routine can reduce many common issues.
Before production, operators should check the machine, film, printed material, and work area.
Key preventive practices include:
- Check film specifications before use.
- Confirm temperature and speed settings.
- Keep rollers clean.
- Remove dust from printed sheets.
- Align film correctly.
- Test unfamiliar materials first.
- Allow laminated sheets to cool.
- Store film in suitable conditions.
- Inspect the first finished sheets.
Operators should also keep records of successful settings. These records can make future jobs easier when the same materials return to production.
How to Troubleshoot Lamination Problems
A systematic approach makes troubleshooting more efficient. Operators should identify the visible problem before changing machine settings.
- Start by checking the film and printed material. Confirm that both materials suit the lamination process.
- Next, check temperature, speed, and pressure. Compare the settings with the film manufacturer’s recommendations.
- Then inspect the rollers and film path. Look for adhesive buildup, dirt, damage, or misalignment.
- Run another test sheet after making one adjustment. This approach helps identify which change corrected the problem.
- If the issue continues, test a different roll or material. A defective film roll or incompatible stock may cause repeated problems.
Operators should also avoid using excessive heat or pressure as a quick fix. These changes can create new defects or damage the material.
When to Stop Production
Some problems require more than a simple machine adjustment. Continuing production can increase waste and potentially damage the laminator. Operators should stop when film repeatedly wraps around rollers or feeds incorrectly. They should also stop when unusual noise or movement occurs.
Persistent adhesive buildup may require deeper cleaning or technical service. Damaged rollers and other worn components may also need replacement.
Stopping early can protect both the equipment and the printed materials. It can also prevent a small issue from becoming a larger production problem.
Lamination provides valuable protection and improves the appearance of printed materials. However, good results depend on proper preparation, suitable materials, and correct machine settings.
Bubbles, wrinkles, poor adhesion, silvering, peeling, curling, and uneven lamination can affect finished quality. Most problems have identifiable causes that operators can address through careful checks.
The best approach starts with prevention. Keep equipment clean, follow film specifications, prepare printed materials carefully, and test unfamiliar materials.
When problems occur, change one setting at a time. Check the film, material, temperature, speed, pressure, and roller condition before continuing production.
With a consistent workflow and regular equipment care, operators can reduce waste and achieve cleaner lamination results. Good troubleshooting also helps maintain steady production and better finished products.